- Create a Propel Application.
- Create the destination in Airbyte.
- Create your first Airbyte to Propel connector.
- Lastly, how to stop Airbyte.
Prerequisites
To connect Propel to Airbyte, you need the following:- A Propel account.
- A Propel Application with the
ADMINscope.
1
Create a Propel Application
You must create a Propel Application. Propel Applications provide the API credentials, allowing the Airbyte destination to access the Propel API.Follow the guide to Create a Propel Application.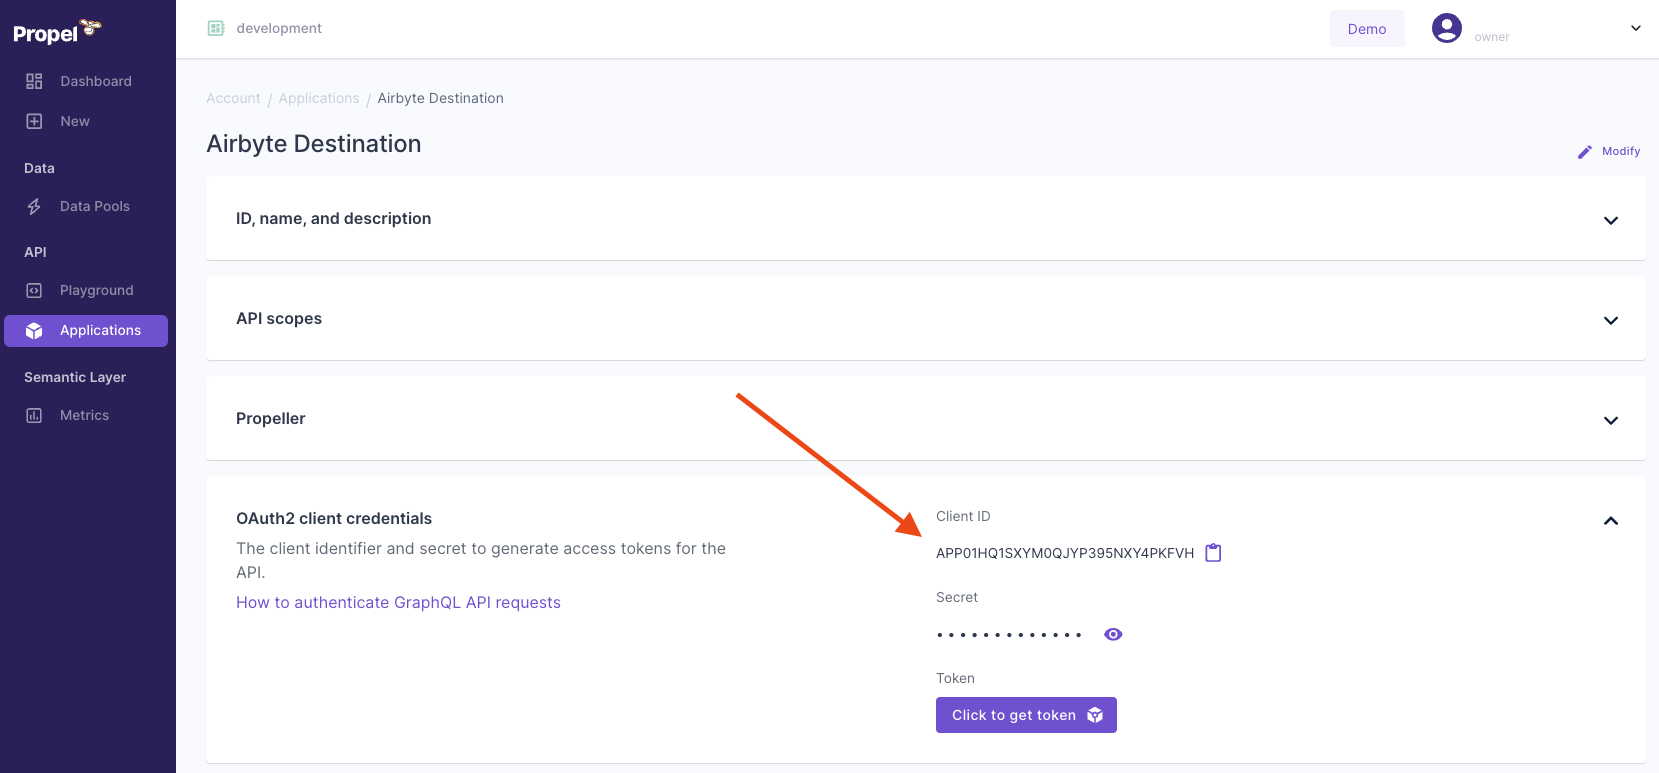
- Give it a Unique Name. For example, ‘Airbyte Destination’.
- Provide a Description. For example, ‘The Airbyte Destination app’.
- In the API scopes section, in the Scopes drop-down menu, select the
ADMINscope. - Select a
P1_X_SMALLPropeller. This is sufficient for Airbyte Applications.
2
Create a Propel destination in Airbyte
Only Airbyte Open Source supports the Propel destination. In this section, you’ll learn how to set up Airbyte and connect your Propel destination.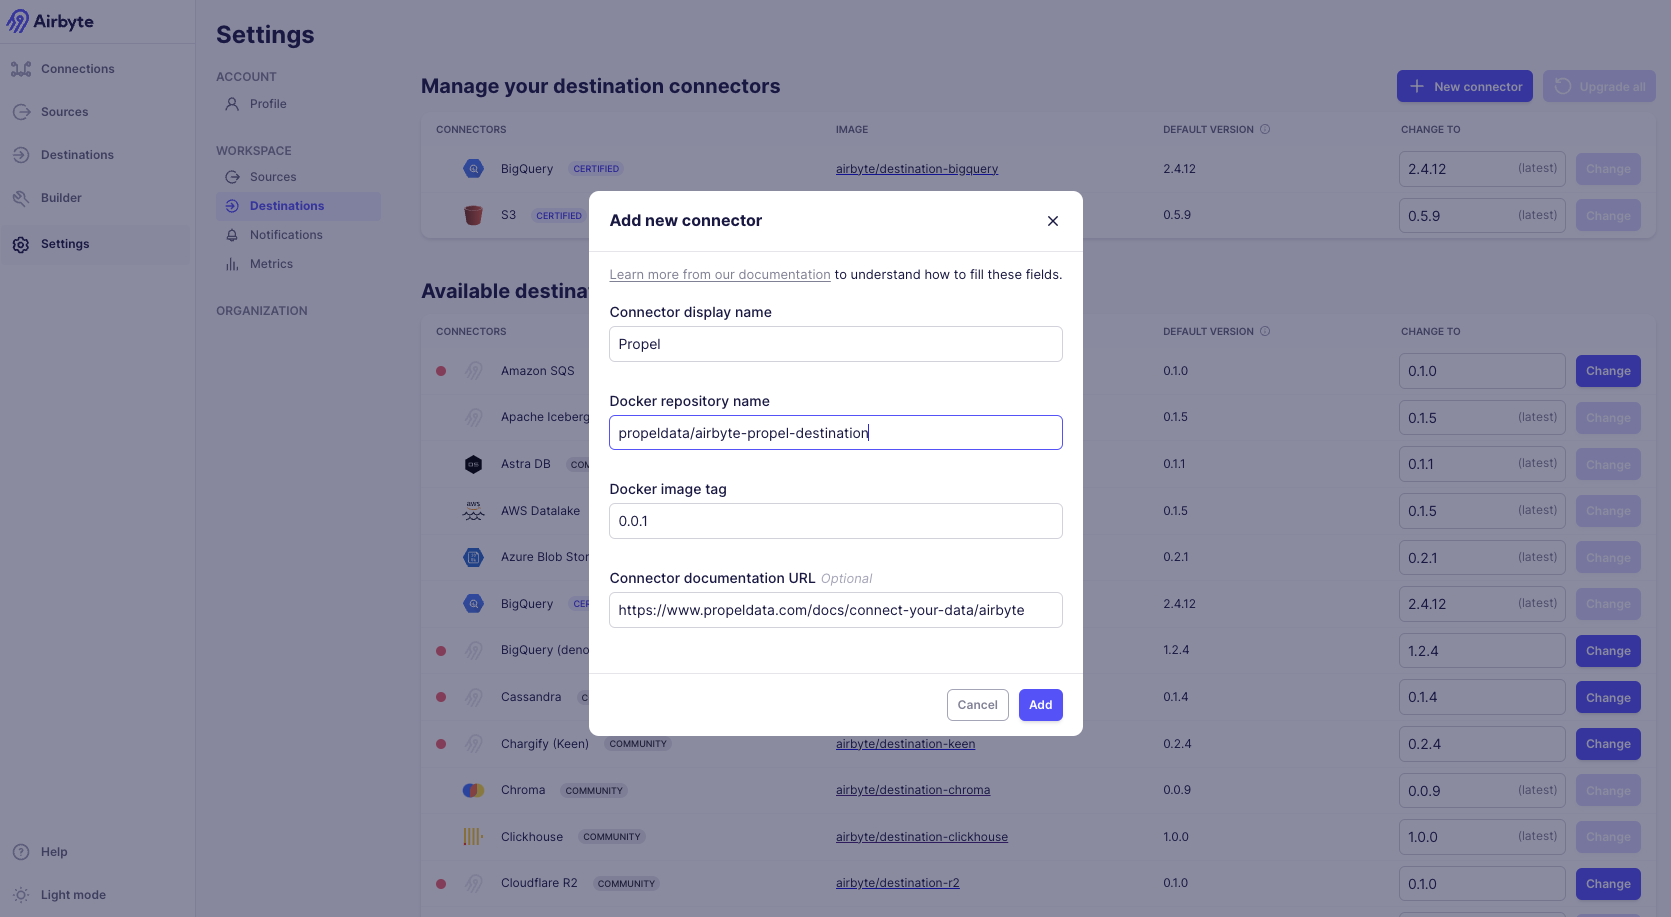
Requirements
- Docker Desktop (Docker terms apply)
Set up Airbyte locally
- Install Docker Desktop.
- Clone the Airbyte repo and run the startup script:
- Open Airbyte in the browser at http://localhost:8000.
Create your first Airbyte to Propel connection
Now that Airbyte is running locally, let’s set up the custom Propel destination.- In the Airbyte dashboard, click “Settings” on the bottom left.
- Click “Destinations” on the left sidebar.
- Click the “New connector” button.
- Click the “Add a new Docker connector” option.
- Fill in the connector values as follows:
- Connector display name:
Propel - Docker repository name:
propeldata/airbyte-propel-destination - Docker image tag:
latest - Connector Documentation URL:
https://www.propeldata.com/docs/ingestion/airbyte
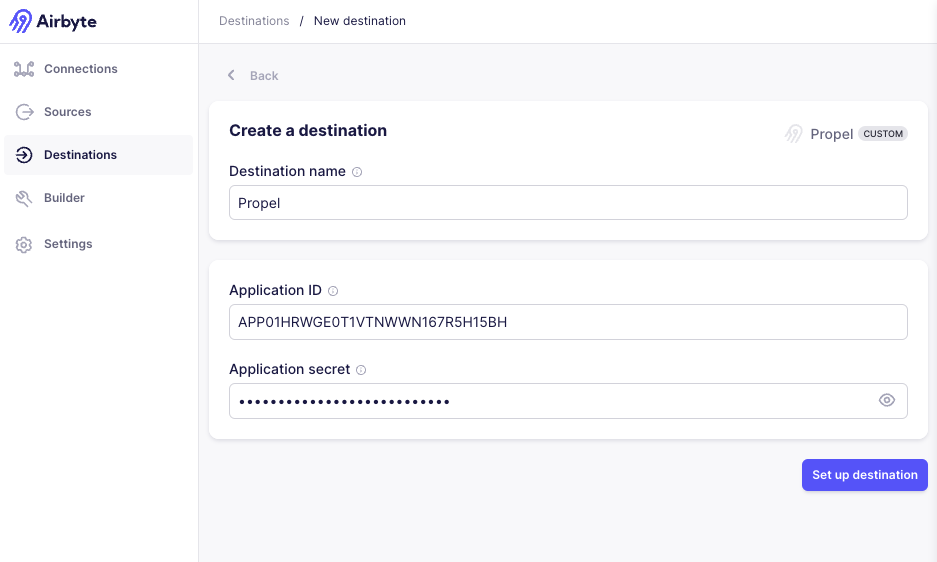
Enter the Propel Application credentials in Airbyte
You’re now ready to connect Propel to Airbyte.- Enter the Application ID and secret you found in Step 1.
- Click “Set up destination”. You should get a success message that the connection test passed.
3
Create a new connection
Now that the Propel destination is set up, you can create a new connection to sync data from any Airbyte source to Propel.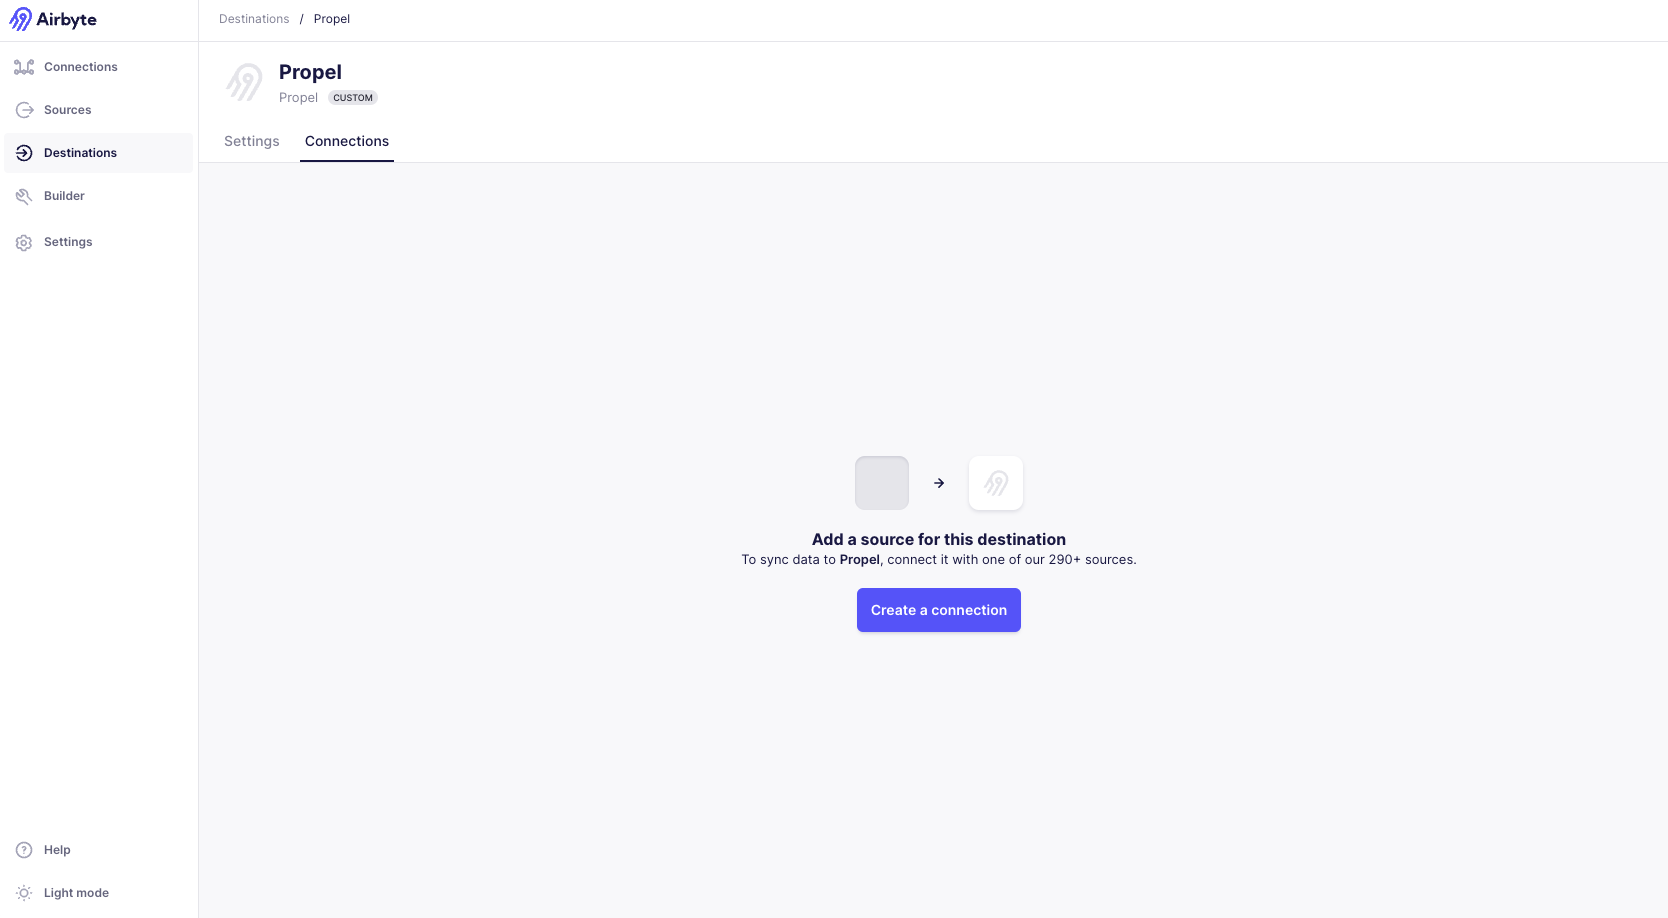
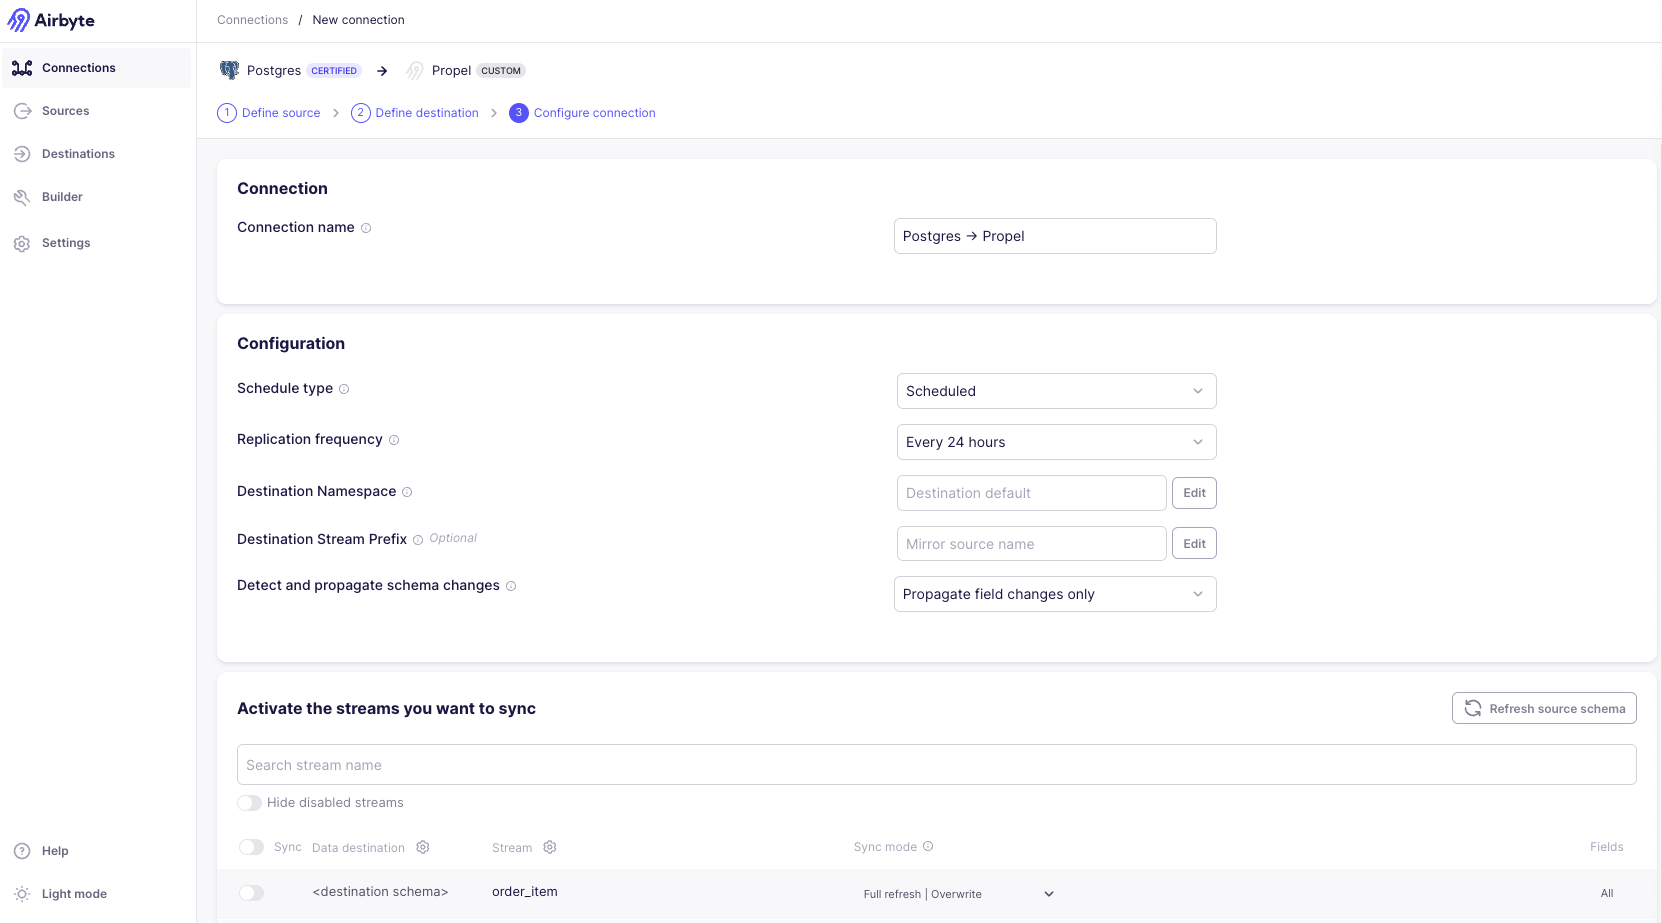
- Click on “Create a connection”.
- Select the source you want to sync data from.
- Configure the sync settings.
- Finally, click “Set up connection”.
4
Stopping Airbyte
At any point, you can disable any incremental or full syncs by going to the ‘Connection’ settings page and clicking ‘Delete this connection’. This will not touch any of the source or destination data, but will prevent Airbyte from doing any further operations.