Requirements
- You have a Propel account.
- You have an Amazon S3 bucket configured with at least one Parquet file.
Step 1: Create an IAM policy and user for Propel
1
Create a new IAM policy
Create an AWS IAM policy to allow listing bucket contents and retrieving files:
- Create a JSON file named
propel-s3-policy.jsonwith the following content, replacing<YOUR_BUCKET_NAME>with your actual bucket name:
- Use the AWS CLI to create an IAM policy:
- Note the ARN of the created policy from the output. You’ll need this in the next step.
2
Create a new IAM user
Create an IAM user in your AWS account using the AWS Console or CLI.
3
Attach the IAM policy to the user
Connect the IAM policy you created in Step 1 directly to the IAM user you created in Step 2.
4
Create an access key for your IAM user
Create a new Access Key for the user you created.Note down the secret access key immediately, as it won’t be displayed again.You’ll use this Access Key and Secret Access Key in the next main step.For more information, read the AWS documentation on controlling access to S3 buckets.
Step 2: Create an Amazon S3 Data Pool
Now that you have configured your AWS IAM user for access, you can create an Amazon S3 Data Pool.- Console
- API
- Terraform
1
Create an Amazon S3 Data Pool
Go to the “Data Pools” section in the Console, click “Create Data Pool” and click on the “Kafka” tile.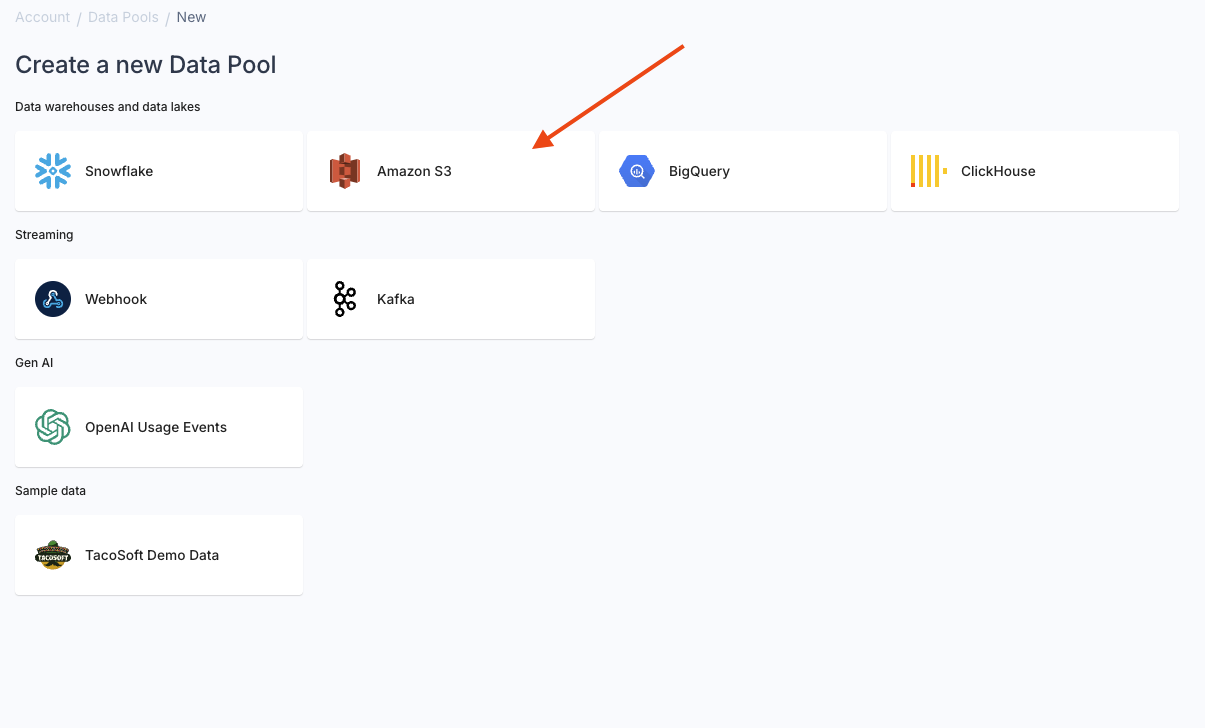 If you create an Amazon S3 Data Pool for the first time, you must create your Amazon S3 credentials for Propel to connect to your Amazon S3 bucket.
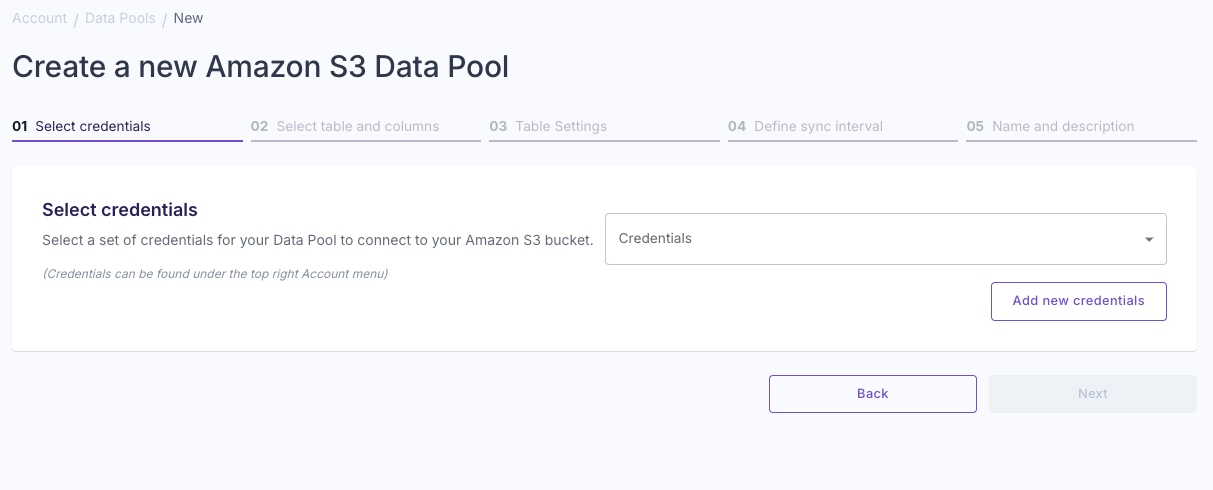
2
Create your Amazon S3 credentials
To create your Amazon S3 credentials, you will need the following details from Step 1: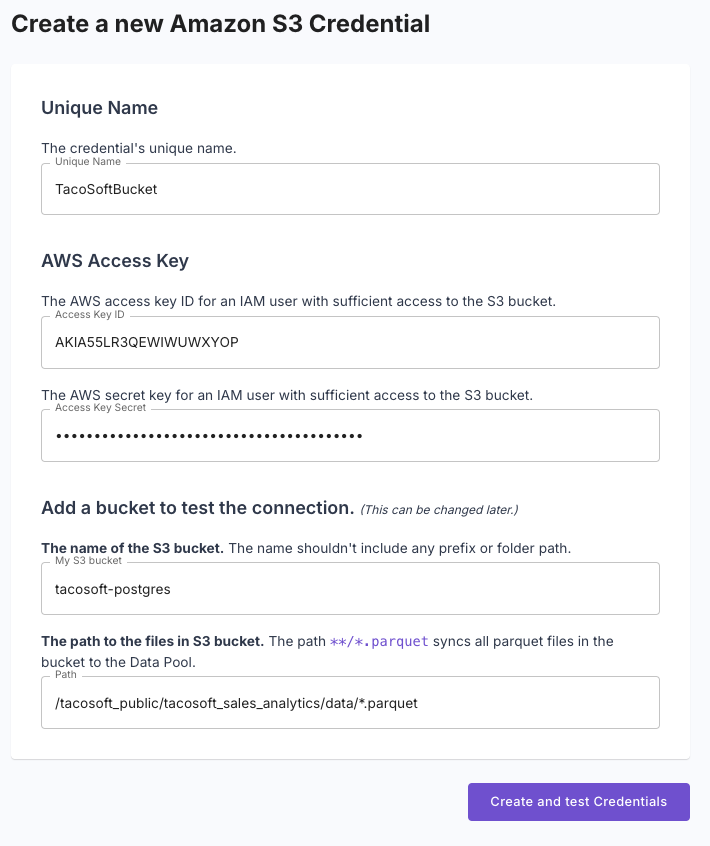
- Access Key ID: The access key ID for your IAM user.
- Secret Access Key: The secret access key for your IAM user.
- Bucket Name: The name of your S3 bucket.
- Path: The path to the files in your S3 bucket.
3
Test your credentials
After entering your Amazon S3 credentials, click “Create and test credentials” to ensure Propel can successfully connect to your Amazon S3 bucket.If the connection is successful, you will see a confirmation message. If not, check your entered credentials and try again.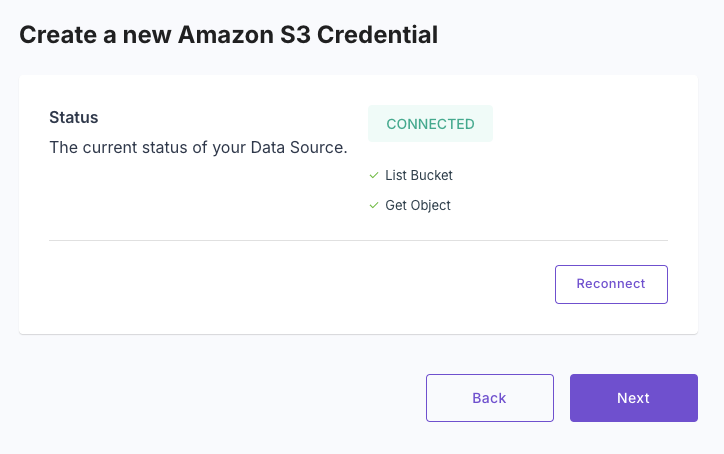
4
Define the schema
There are two ways to define the schema for the table: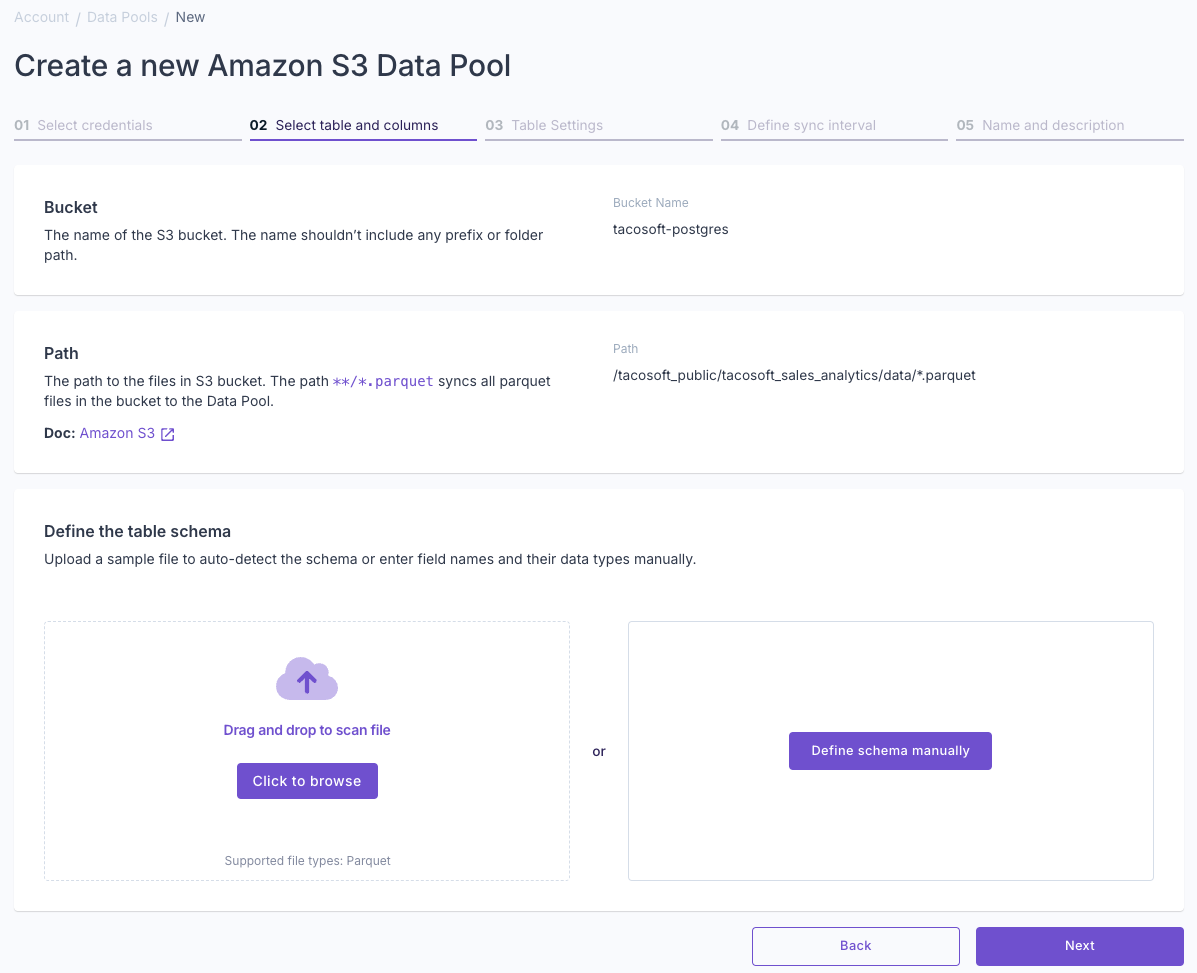 Once you’ve uploaded a Parquet file or defined the schema manually, you’ll see the schema preview.
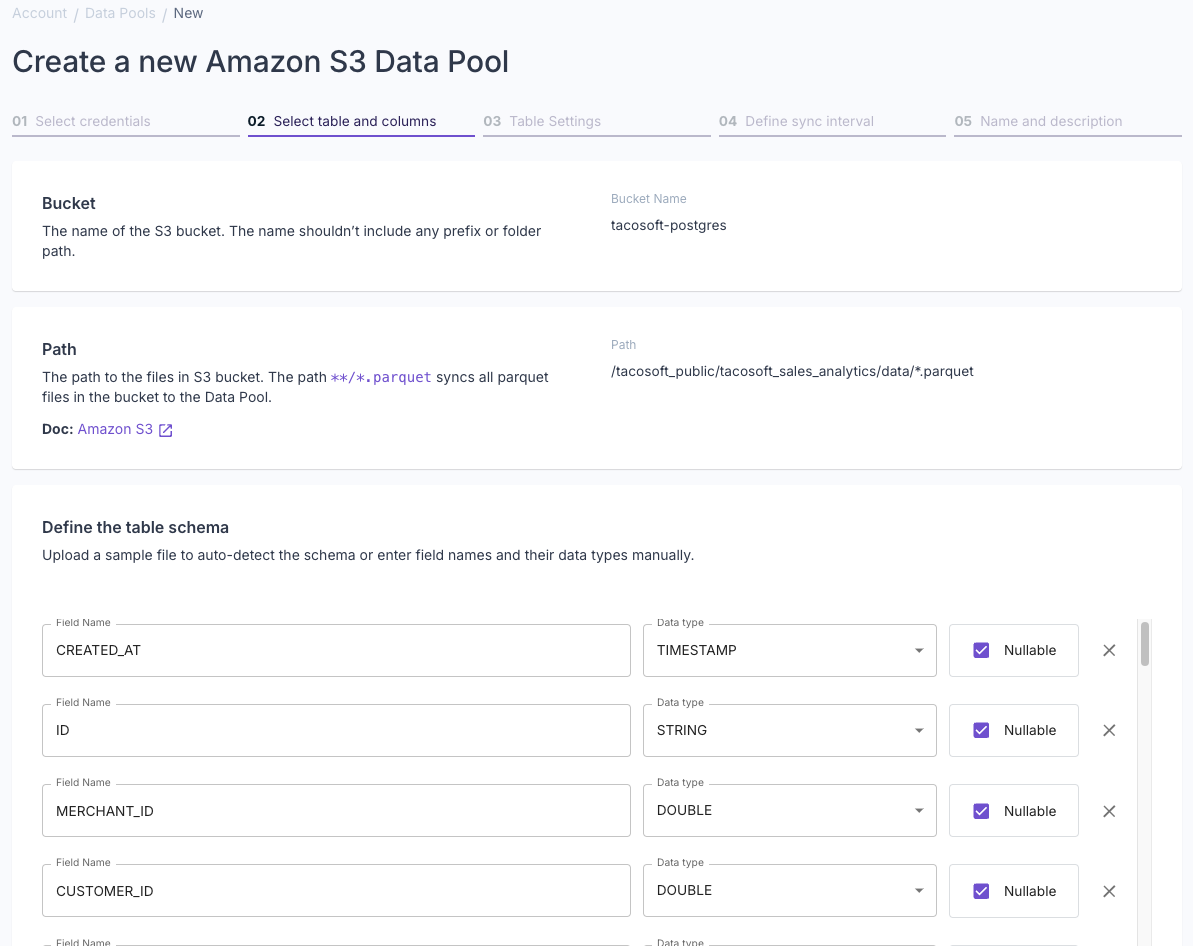 Once the schema is defined, click “Next”.
-
Drag and drop a Parquet file from your filesystem. The Parquet file’s schema should match the Parquet files located in your S3 bucket. Propel will scan the file and generate the schema based on the data.
Propel does not upload the file. The file is scanned locally in the browser for discovering the schema only.
- Alternatively, you can define the schema manually by specifying the name, type, and nullability for each column you want to import.
5
Configure data type and settings
Select whether your data is “Append-only” or “Mutable data”.To learn more, read out guide on Selecting table engine and sorting key.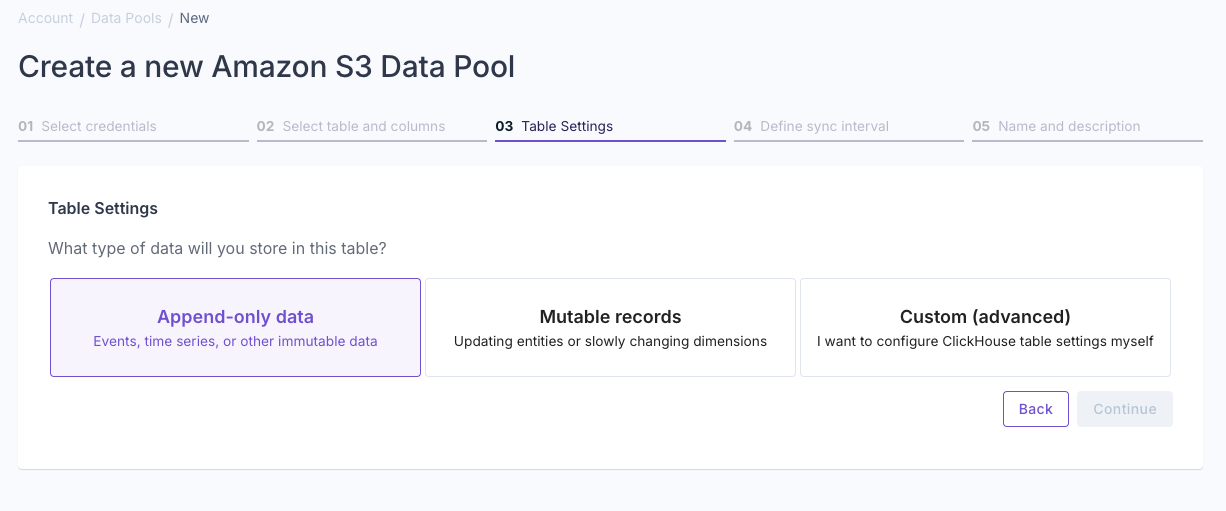 Answer the questions in the wizard to complete the setup.
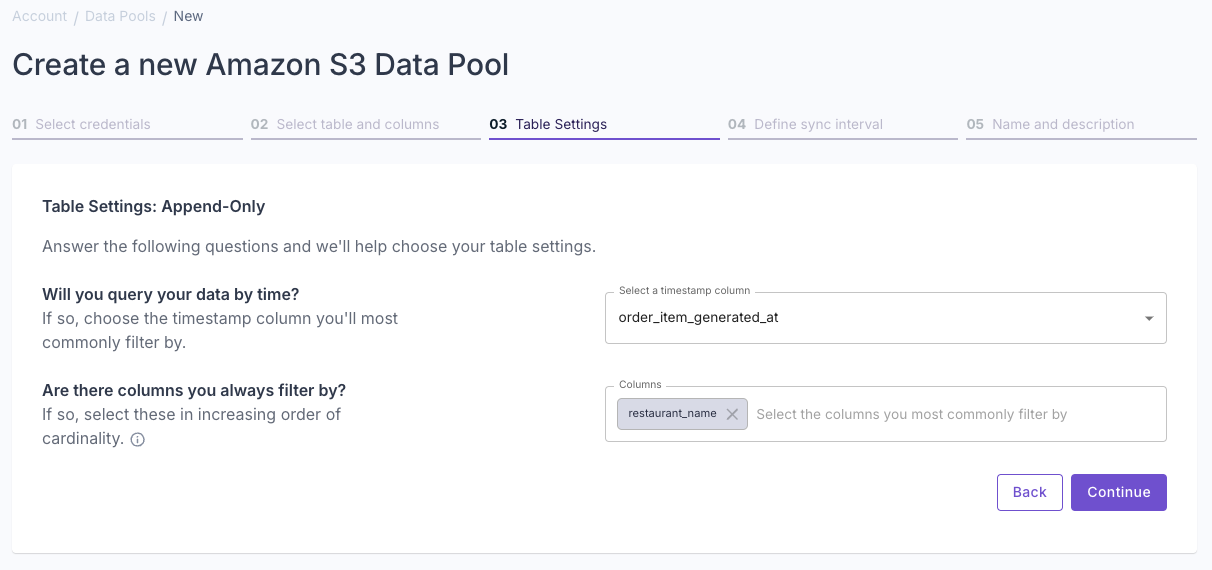 Confirm your table settings and click “Continue”.
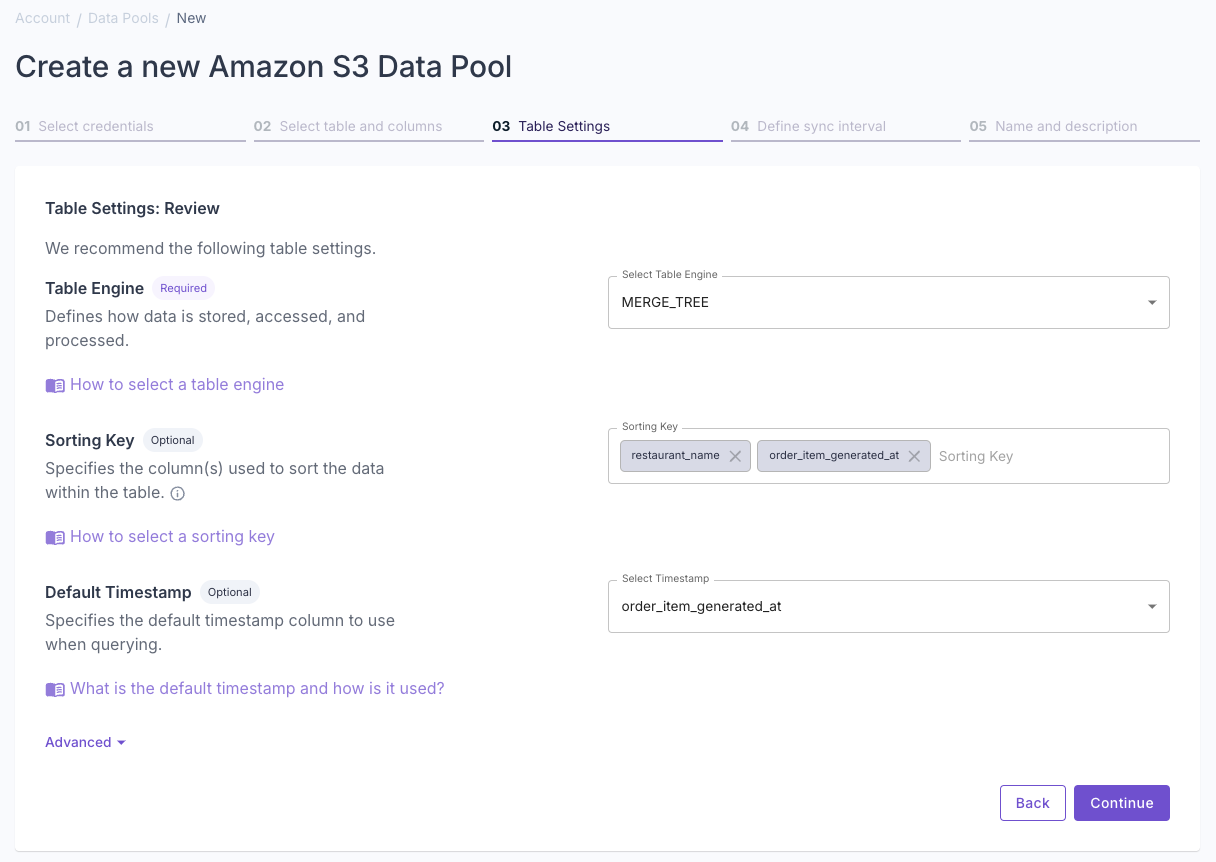
6
Set sync interval
Specify how often you want Propel to sync your data.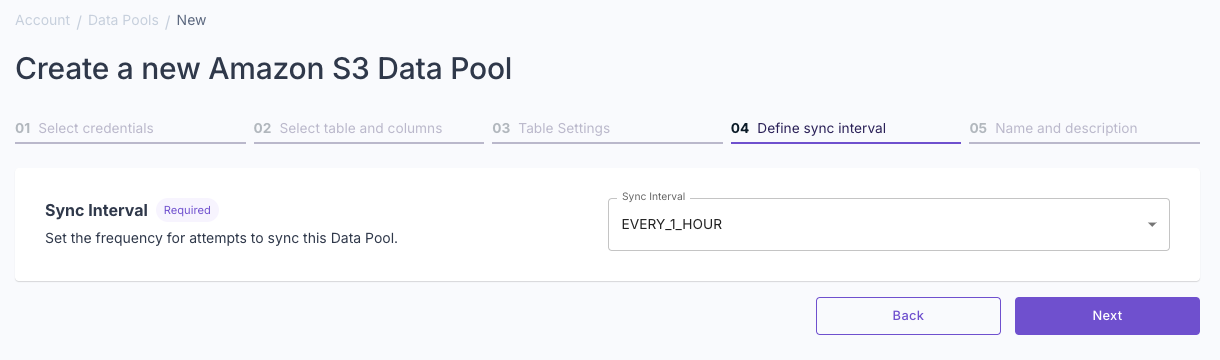
7
Name your Data Pool
You can enable access policies later to restrict access to the data pool.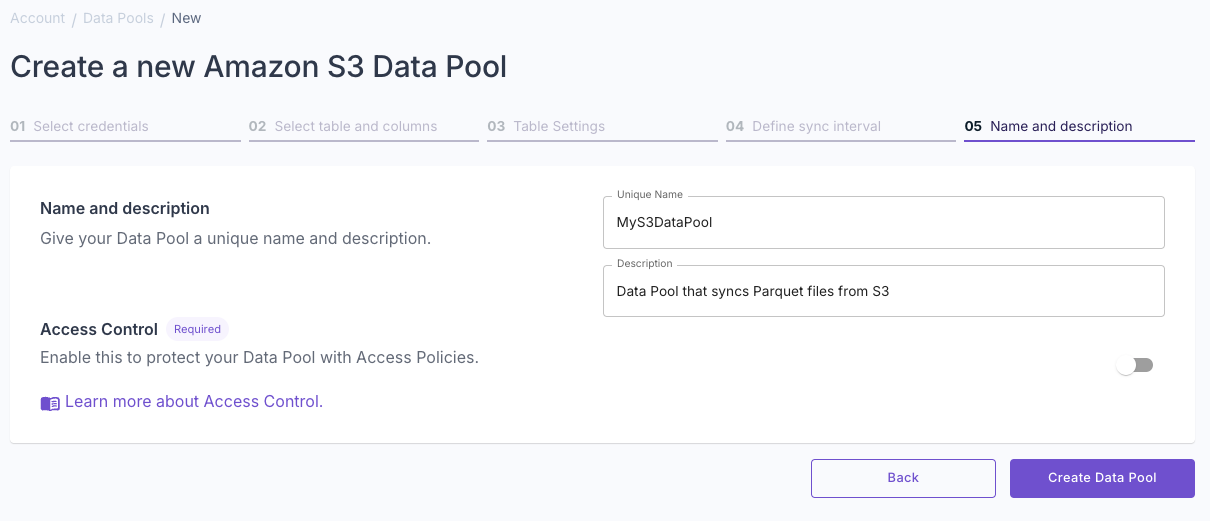 Click “Create Data Pool” to complete the setup.
8
Confirm setup and preview data
Ensure your data pool setup is accurate by checking the following: Lastly, click on the “Preview Data” tab to view a sample of your data and ensure it looks as expected.
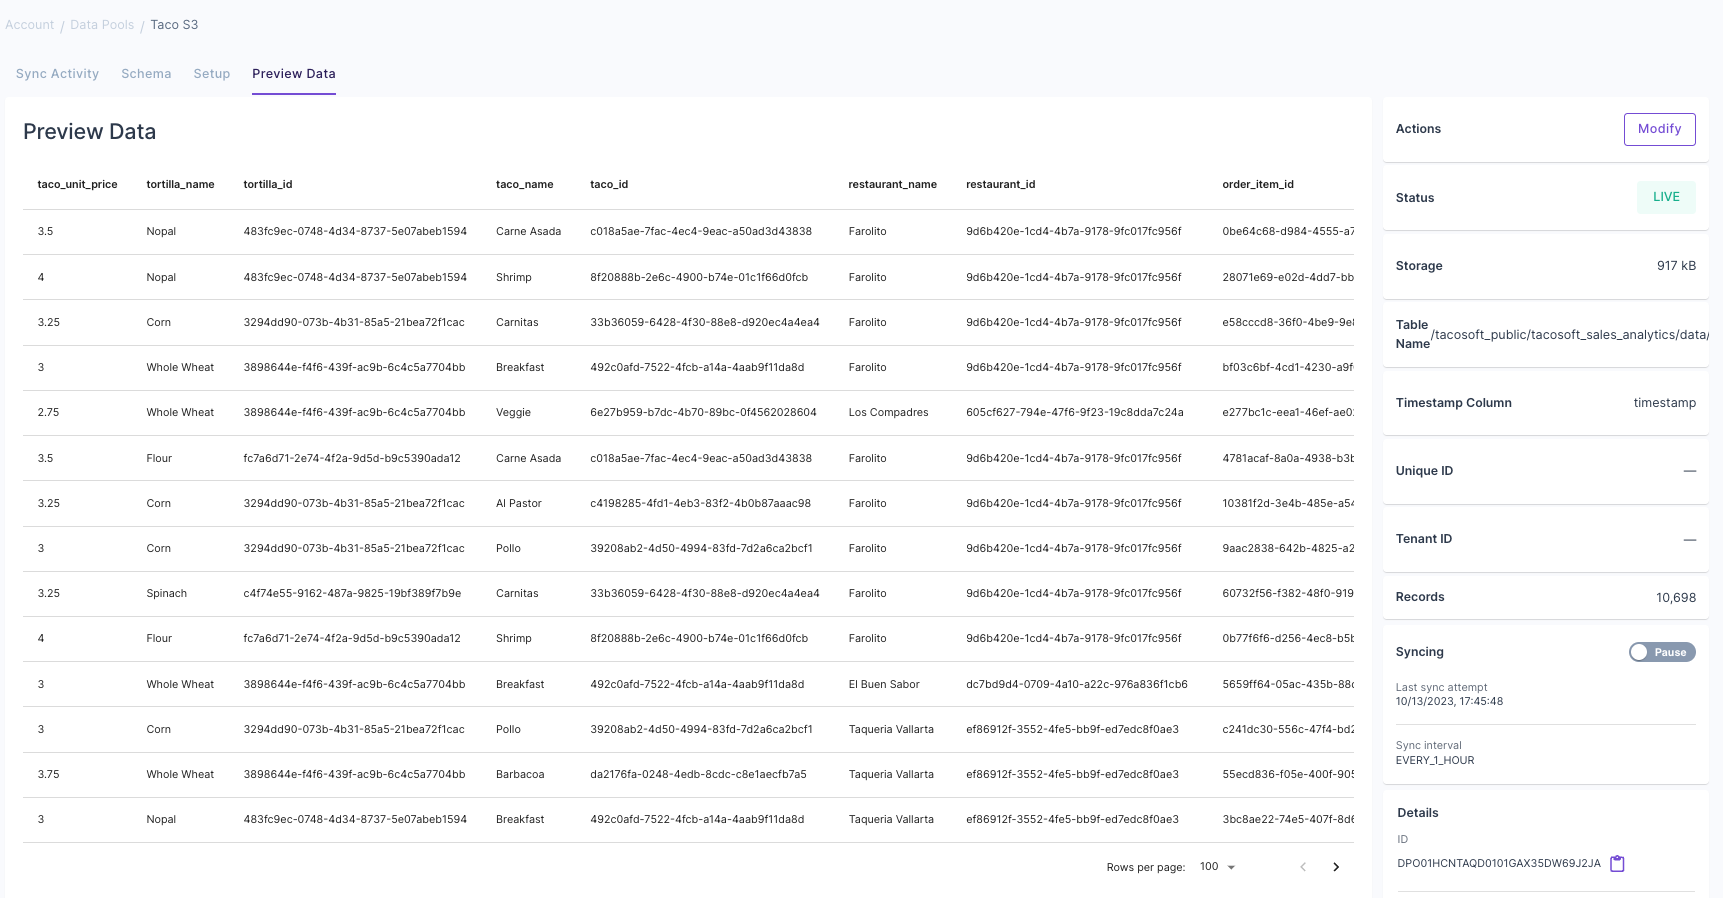
- Status: Ensure it’s set to “LIVE”.
- Records: Validate the number of records matches your dataset.