How to ingest JSON events into Propel

This guide explains how to send JSON events to Propel over HTTPS from any application or SaaS service.

It covers how to set up a Webhook Data Pool, send events to it, and see the events arrive in the Data Pool.

  1. Create a Webhook Data Pool
  2. Send events to the Webhook Data Pool
  3. See your events in the Data Pool

Requirements​


Step 1: Create a Webhook Data Pool​

As a first step, you need to create a Webhook Data Pool. In the Console, click on “Data Pools” in the left-hand menu. Click on “Create Data Pool” and select “Webhook”.
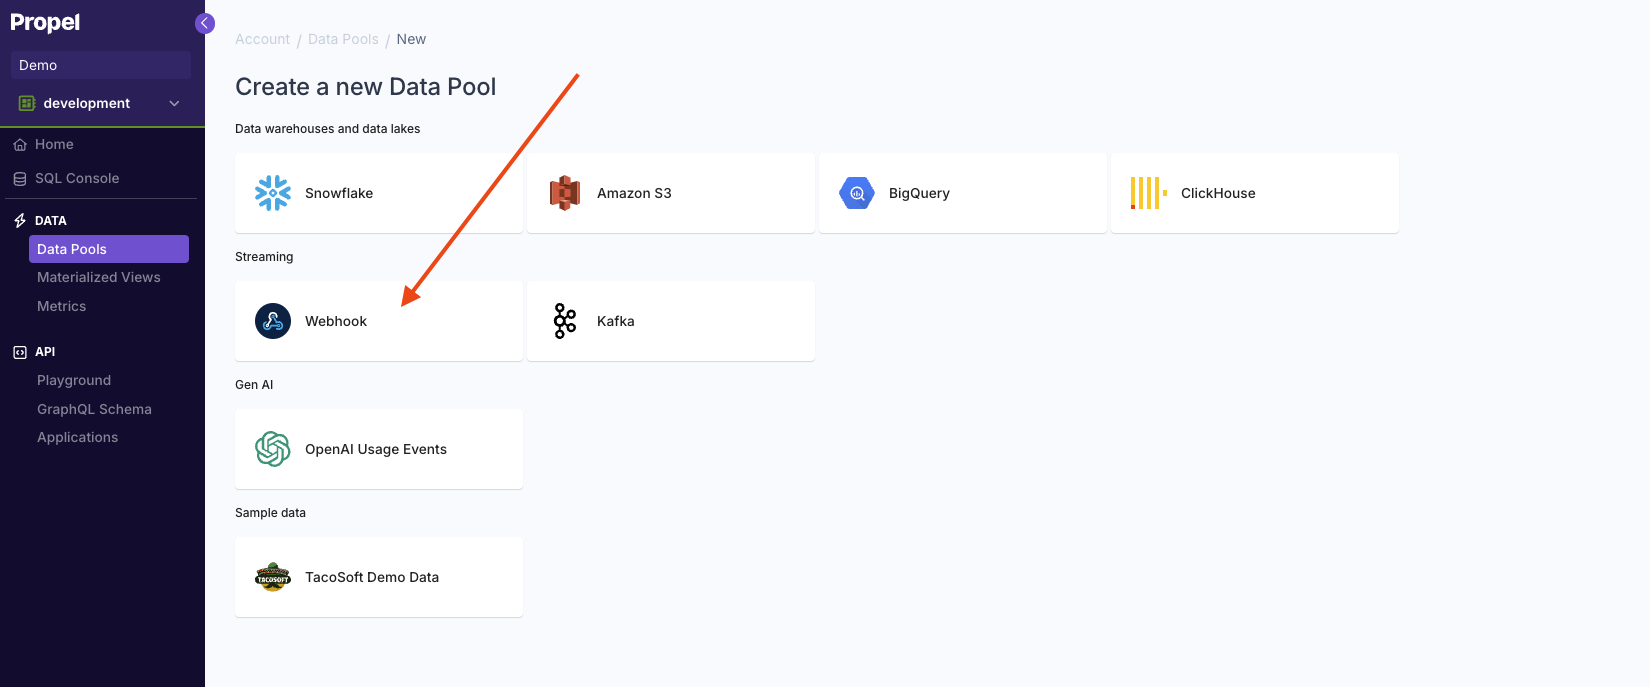
A screenshot demonstrating how to select a Webhook Data Pool in the Propel Console.

Define the schema​

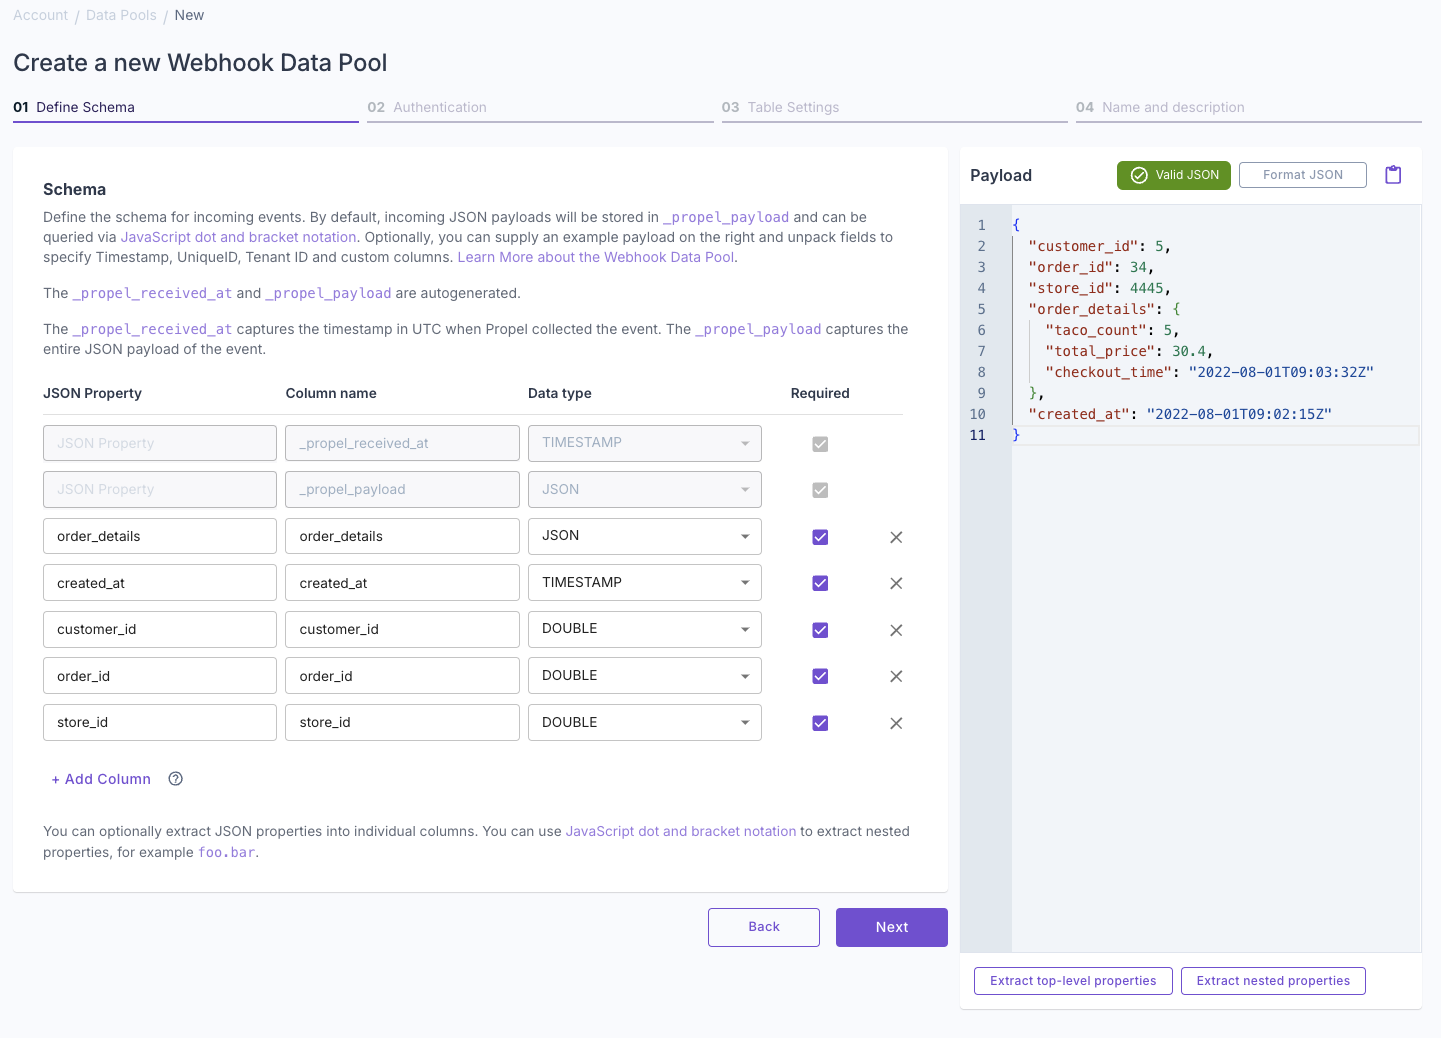
Next, you need to define the schema for your new Data Pool. You’ll notice that the default schema contains two columns:

ColumnTypeDescription
_propel_received_atTIMESTAMPThe timestamp when the event was collected in UTC.
_propel_payloadJSONThe JSON Payload of the event.

If you do no further editing, you can create your Webhook Data Pool as is, and any JSON sent to this webhook will be stored and available for querying in _propel_payload.

However, take note of the Payload section on the right-hand side. Here, you can type or paste JSON for a sample event you intend to send to Propel. This lets you unpack top-level or nested keys from the incoming JSON event into specific columns. This feature provides convenience for commonly used keys, the ability to use them as Metric dimensions, and is particularly useful for setting an appropriate timestamp and tenant ID that are included as part of the payload.

For this guide, we will use the same TacoSoft sample data from the Quickstart. The example JSON event we will be collecting looks like this:

{
"customer_id": 5,
"order_id": 34,
"store_id": 4445,
"order_details": {
"taco_count": 5,
"total_price": 30.4,
"checkout_time": "2022-08-01T09:03:32Z"
},
"created_at": "2022-08-01T09:02:15Z"
}

So, if we add our TacoSoft event JSON payload, we should see the following:

A screenshot demonstrating the initial schema for a new Webhook Data Pool in the Propel Console.

Note that Propel has confirmed the validity of the JSON. Propel provides the convenience of extracting all top-level or nested properties into the schema with just one click. In this example, we will click on "Extract nested properties". This action will create columns representing our sample event's nested JSON keys.

After clicking that, you should see this:

A screenshot demonstrating how to define the schema for a new Webhook Data Pool in the Propel Console.

All nested keys are now part of our schema definition. The system has also auto-detected and set the appropriate data type, though the user can override this.

Before clicking Next, set created_at as your primary Timestamp. We’ll want the time when the event was created, not when it was received, as the primary timestamp. If you need to control access to this data based on customer ID for multi-tenant SaaS applications, you can optionally specify the customer_id column as your Tenant ID. However, in this example, we will not select a Tenant ID. Click Next.

note

Make sure your sample event and the schema you create are correct. A schema cannot be modified after a data pool is created.

Configure Authentication​

Optionally, you can specify a username and password to enable HTTP basic authentication on the webhook URL that events will be sent to. For testing purposes, this can be left blank and edited later. Click on Next.

A screenshot demonstrating how to configure authentication for a new Webhook Data Pool in the Propel Console.

Set a name and description​

Lastly, enter a unique name and description for your new Data Pool and click “Next”. For this example, we’ll name our new Data Pool “TacoHook”, and the description would be “Data Pool for Taco Orders received.”
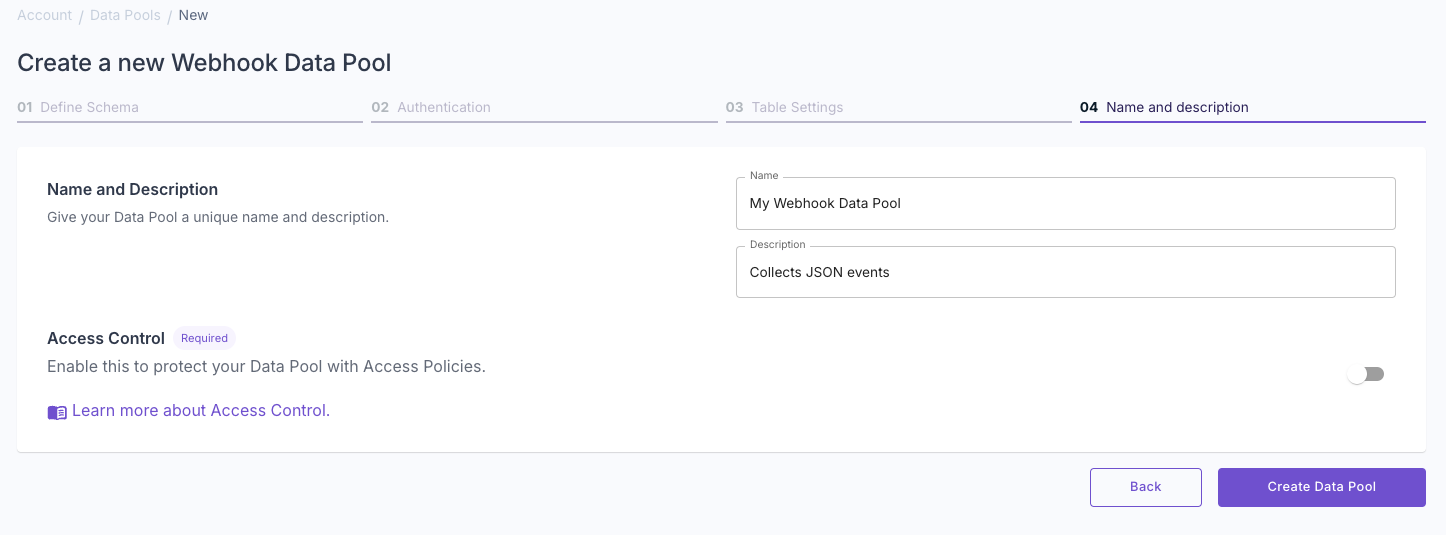
A screenshot demonstrating how to add a name and description to a new Webhook Data Pool in the Propel Console.

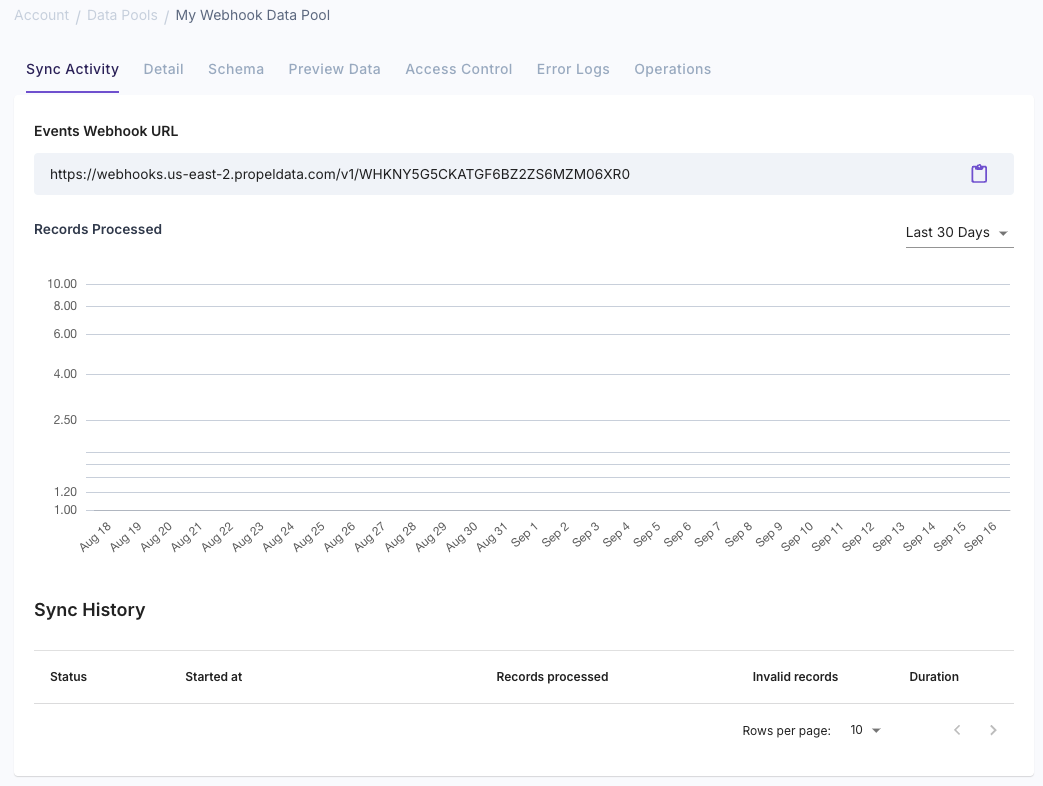
Once your Webhook Data Pool is created, you will see the HTTP URL to which you can post JSON data on the overview screen. In our example, the Data Pool would be named "TacoHook".

A screenshot demonstrating a new Webhook Data Pool in the Propel Console.

Step 2: Send events to the Webhook Data Pool​

You can send a batch of JSON events to the Webhook Data Pool by making an HTTP POST request to the Data Pool's URL. One way to easily test this is by using cURL from a terminal window. For example:

curl https://webhooks.us-east-2.propeldata.com/v1/WHK... \
-X POST \
-H "Content-Type: application/json" \
-d '[
{
"customer_id": 5,
"order_id": 34,
"store_id": 4445,
"order_details": {
"taco_count": 7,
"total_price": 25.90,
"checkout_time": "2023-07-31T15:20:10Z"
},
"created_at": "2023-07-31T14:50:35Z"
},
{
"customer_id": 8,
"order_id": 22,
"store_id": 1199,
"order_details": {
"taco_count": 3,
"total_price": 15.75,
"checkout_time": "2023-07-31T12:40:21Z"
},
"created_at": "2023-07-31T12:30:55Z"
},
{
"customer_id": 12,
"order_id": 67,
"store_id": 876,
"order_details": {
"taco_count": 10,
"total_price": 42.20,
"checkout_time": "2023-07-31T09:15:50Z"
},
"created_at": "2023-07-31T09:10:25Z"
},
{
"customer_id": 3,
"order_id": 45,
"store_id": 662,
"order_details": {
"taco_count": 2,
"total_price": 10.50,
"checkout_time": "2023-07-31T18:05:15Z"
},
"created_at": "2023-07-31T18:00:45Z"
},
{
"customer_id": 9,
"order_id": 56,
"store_id": 256,
"order_details": {
"taco_count": 6,
"total_price": 35.60,
"checkout_time": "2023-07-31T21:30:05Z"
},
"created_at": "2023-07-31T21:20:30Z"
}
]'
note

It is valid to send a single JSON object as an event or an array of JSON objects like the above example.

You should expect a 200 OK with multiple “Event processed successfully” messages in the body of the response, one for each event.

Step 3: See your events in the Data Pool​

Lastly, we'll want to see the events we just sent in our new Data Pool. Click on “Data Pools”, and then select our “TacoHook” Data Pool.

Head over to the “Preview Data” tab, and you should see the events data as POSTed, reflected in the schema we defined.
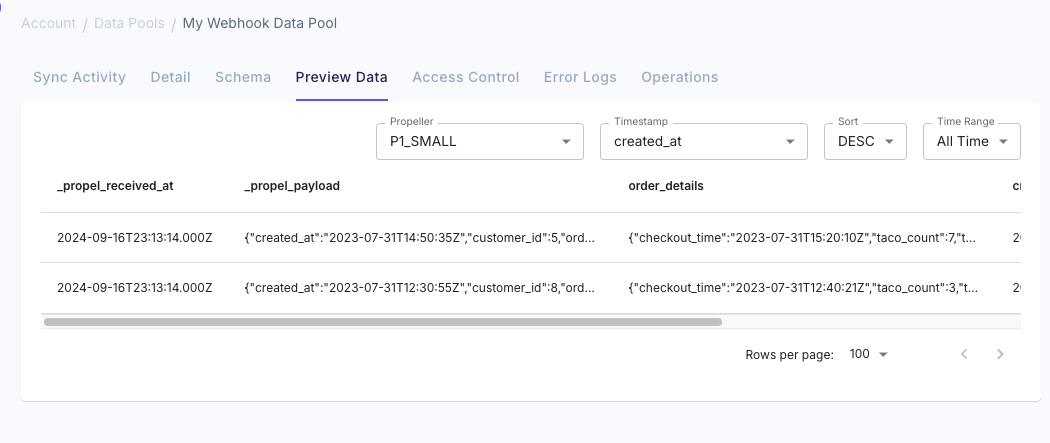
A screenshot demonstrating the Webhook Data Pool in the Propel Console.

note

It may take 1-3 minutes for events to process and show in the “Preview Data” page.

Wrap up​

That's it! To recap, we created a Webhook Data Pool in Propel, sent data into Propel using it, and verified that it arrived in the Data Pool successfully.

What's next?​

You can learn more about using the GraphQL API you set up and check the examples.