Key concepts
- Access Policies: Rules that determine which data each tenant can access.
- JWT Tokens: Secure tokens that carry tenant-specific information.
- Dynamic row-level filtering: Allows one policy to serve multiple tenants.
Implementing multi-tenant security
1
Create a single, dynamic access policy
Instead of creating a separate policy for each tenant, define one policy with dynamic filtering: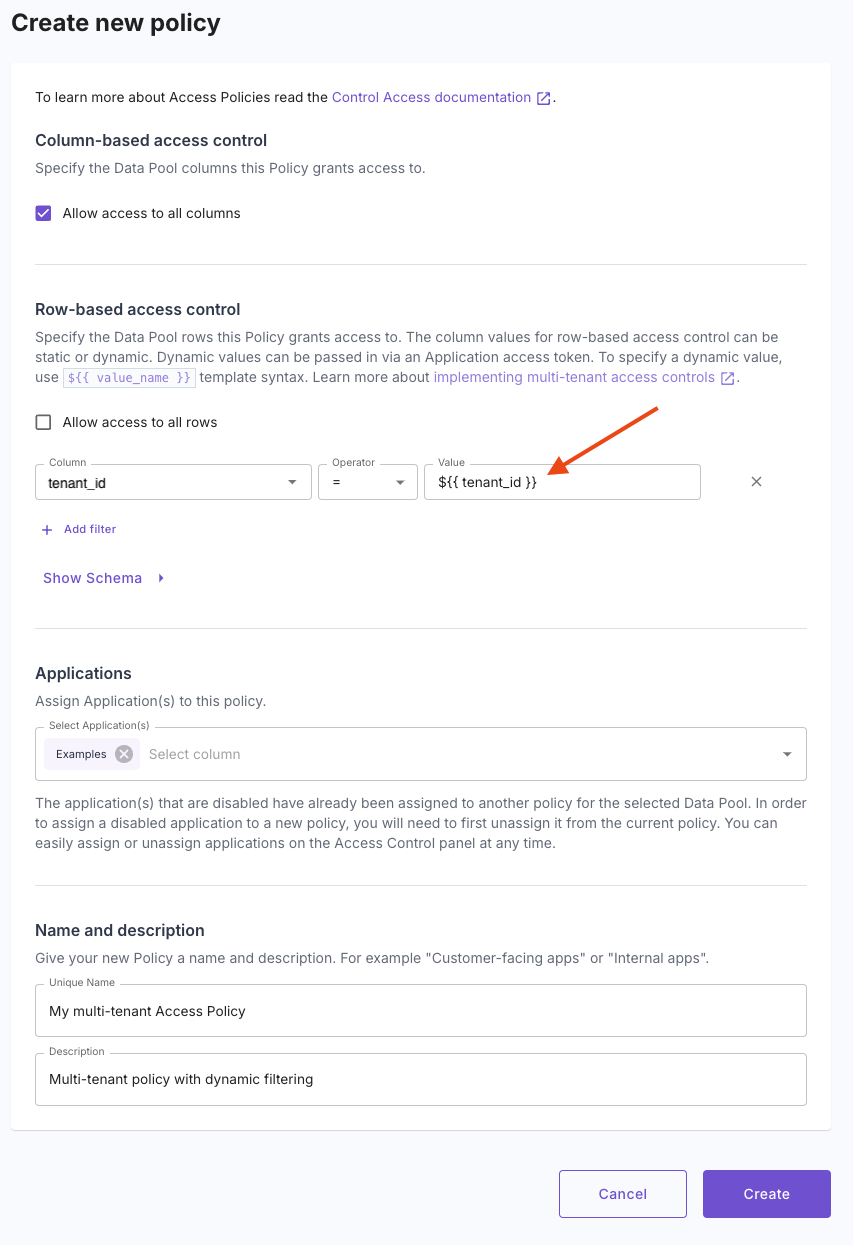 —This policy uses
- Console
- API
- Terraform
Creating an Access Policy for multi-tenant access control
${{ tenant_id }} as a placeholder, which will be filled with the actual tenant ID at runtime.2
Generate tenant-specific JWT tokens
When a user logs in, mint a JWT token that includes their tenant ID:
3
Use the token for data queries
When querying Propel’s API, include this token in the Authorization header. Propel will automatically apply the correct tenant filter.
Benefits
- Scalability: One policy serves all tenants.
- Security: Each tenant is strictly limited to their own data.
- Flexibility: Easily adapt to changes in your data model.
- Multiple levels of tenancy: This models supports multiple levels of tenancy (e.g. Organizations, customers, workspaces and users).
Important Notes
- Always create tokens server-side for security.
- The resulting token is safe to use in frontend code.
- You can include multiple tenant-specific values in the token if needed.