In this blog post, we will explore how to use dbt in conjunction with Snowflake. We will set up accounts for dbt and Snowflake and link the two using the dbt cloud UI, Snowflake's Partner connect, and the command line interface.
What does dbt do?
dbt (data build tool) is an open-source data transformation tool that allows you to execute SQL transformations on raw data to produce clean, analytical-ready datasets. dbt uses a modular approach to organize SQL transformations, enabling you to manage, test, and deploy code more effectively.
By connecting dbt to Snowflake, you can leverage Snowflake's scalable, cloud-based data warehouse to store and process your transformed data.
Source: dbt documentation
Connecting dbt to Snowflake
Let's walk through the steps to integrate dbt with Snowflake.
Prerequisites
To start things off, you must set up both dbt and Snowflake.
- Have a Snowflake account.
- Have a dbt cloud account if you are connecting via the dbt Cloud.
- Have the dbt CLI installed if you are connecting via the CLI.
Connecting dbt to Snowflake
Using the Snowflake Partner Connect
The easiest way to connect dbt to Snowflake is by using Snowflake’s partner connect option.
- Access the partner connect tab under Admin -> Partner Connect and search “dbt” in the search bar.
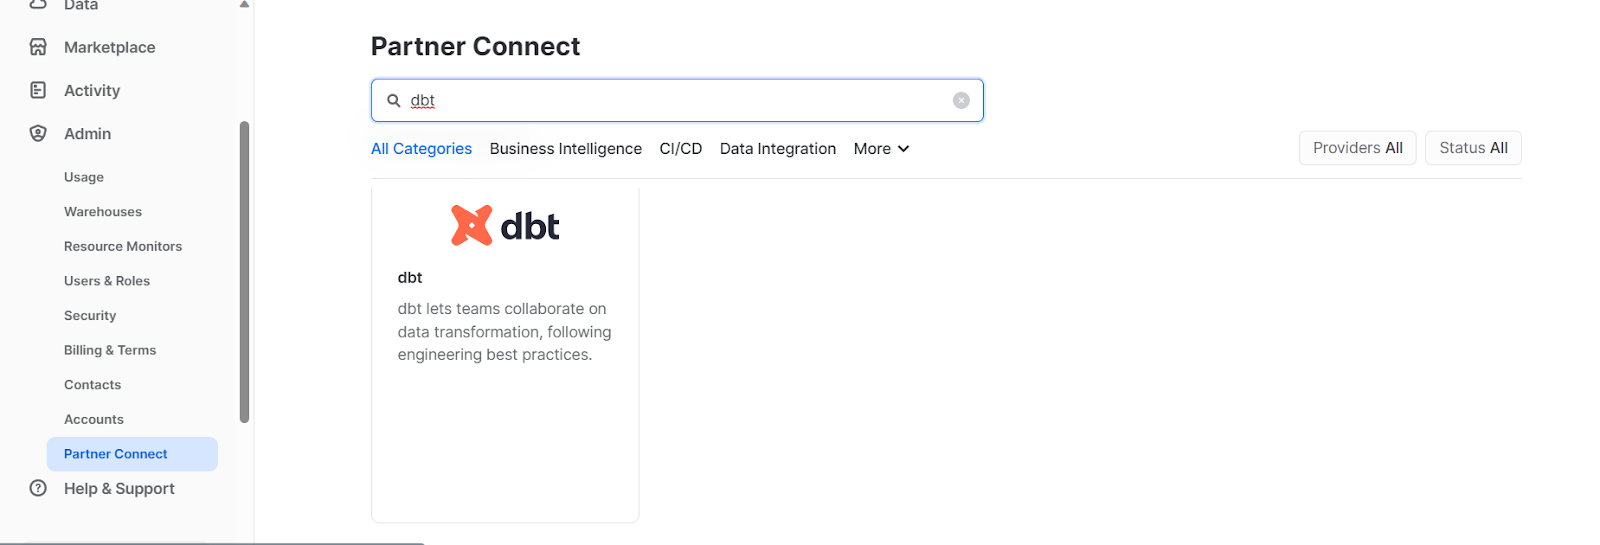
Snowflake Partner Connect
- Click on the dbt card, add additional grants for your test database and click connect.
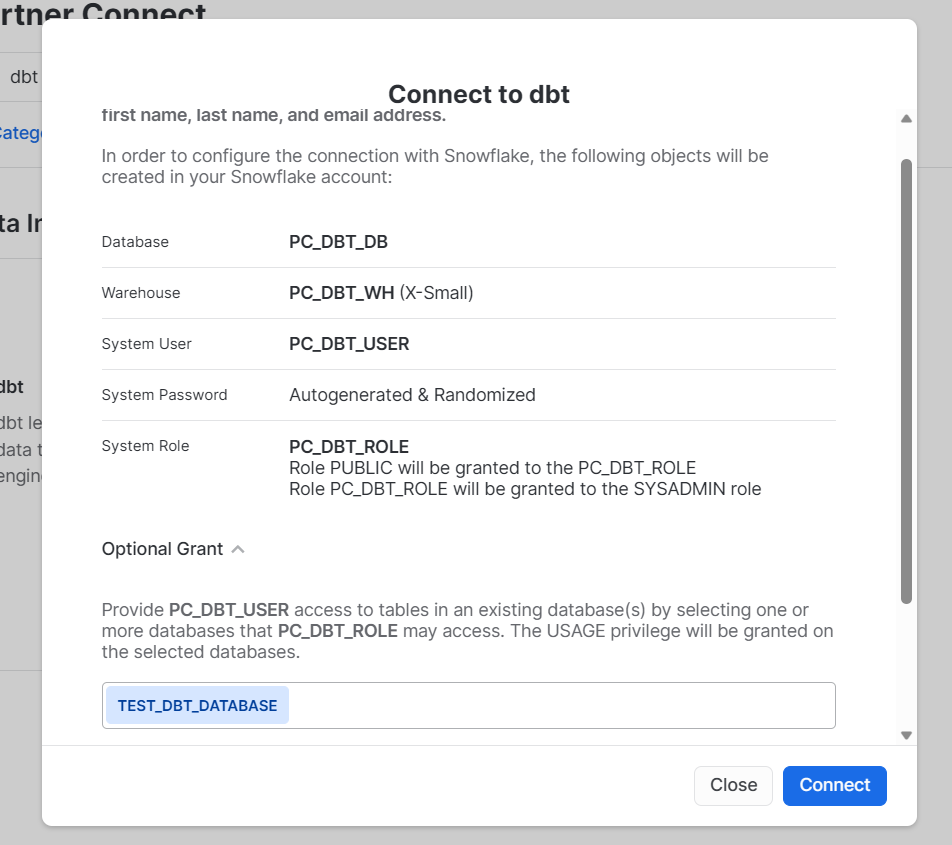
Connect to dbt
- Click Activate on the next prompt.
- You will be taken to the dbt cloud login page. If you do not have a dbt cloud account, you will be prompted to create one. Otherwise, you can simply log in using your existing Account Name.
- On the dbt webpage, go to Account Settings -> Partner Connection Trial.
- Click on “Snowflake” under *Connection to view the connection details.

- Edit Warehouse and Database details to ‘TEST_DBT_WAREHOUSE’ and ‘TEST_DBT_DATABASE’.
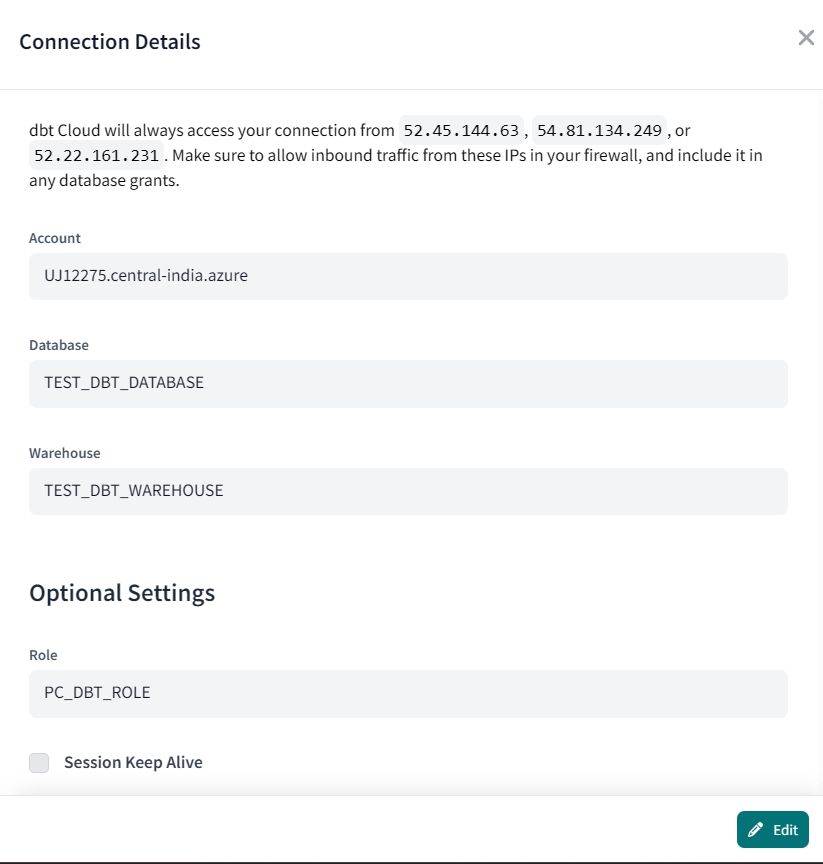
- The connection has been established, and you are ready to create your data models.
Using the dbt Cloud
To connect dbt to Snowflake via dbt Cloud, follow these steps:
- Log in to your dbt Cloud account and create a new project. Give your project an appropriate name

Setup a new project
- In the project settings, click “next” to navigate to the "Connection" tab.
- Choose "Snowflake" as your data warehouse.

Choose Snowflake as a data source
- Fill in the necessary connection information, including account, user, password, role, database, schema, and warehouse.
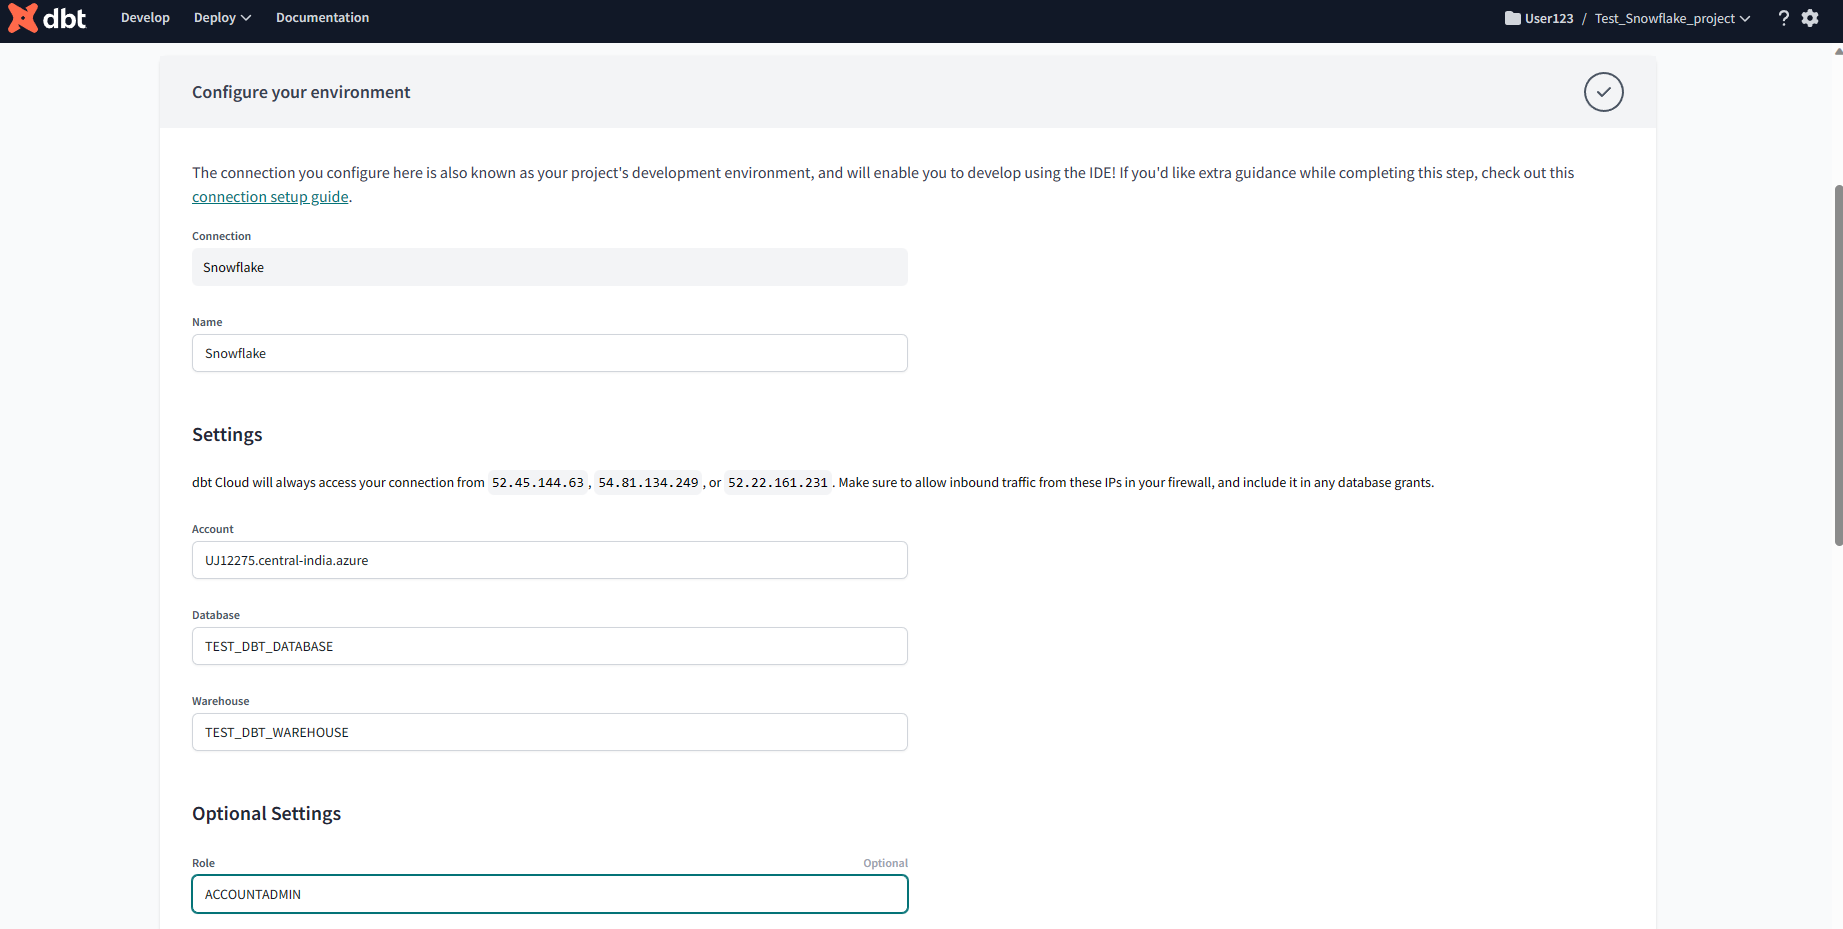
Insert Credentials
- Scroll to the bottom and click on “Test Connection” to ensure it's working correctly.

Test Connection
- Configure additional settings, such as query tags or custom connection parameters, as needed and attach a git repository to work with the project.

Connect Repository
And just like that, you have linked dbt cloud to Snowflake. You can now manage all your models and runs on the project dashboard.
Using the Command Line Interface (CLI)
You will need dbt-core and dbt-snowflake installed using PIP or Homebrew. Once you have them installed, you can continue the connection setup using the command line.
Make sure to create a role TRANSFORMER in Snowflake for dbt.
Initialize a project using the command dbt init <project_name>. The following prompts will ask you to input the authentication parameters described below.
- Database Adapter: Snowflake
- Account Name: <Your Account Name>
- Username: <Your Username>
- Password: <Your Password>
- Role: ACCOUNTADMIN
- Warehouse: DBT_TEST_WAREHOUSE
- Database: DBT_TEST_DATABASE
- Schema: PUBLIC
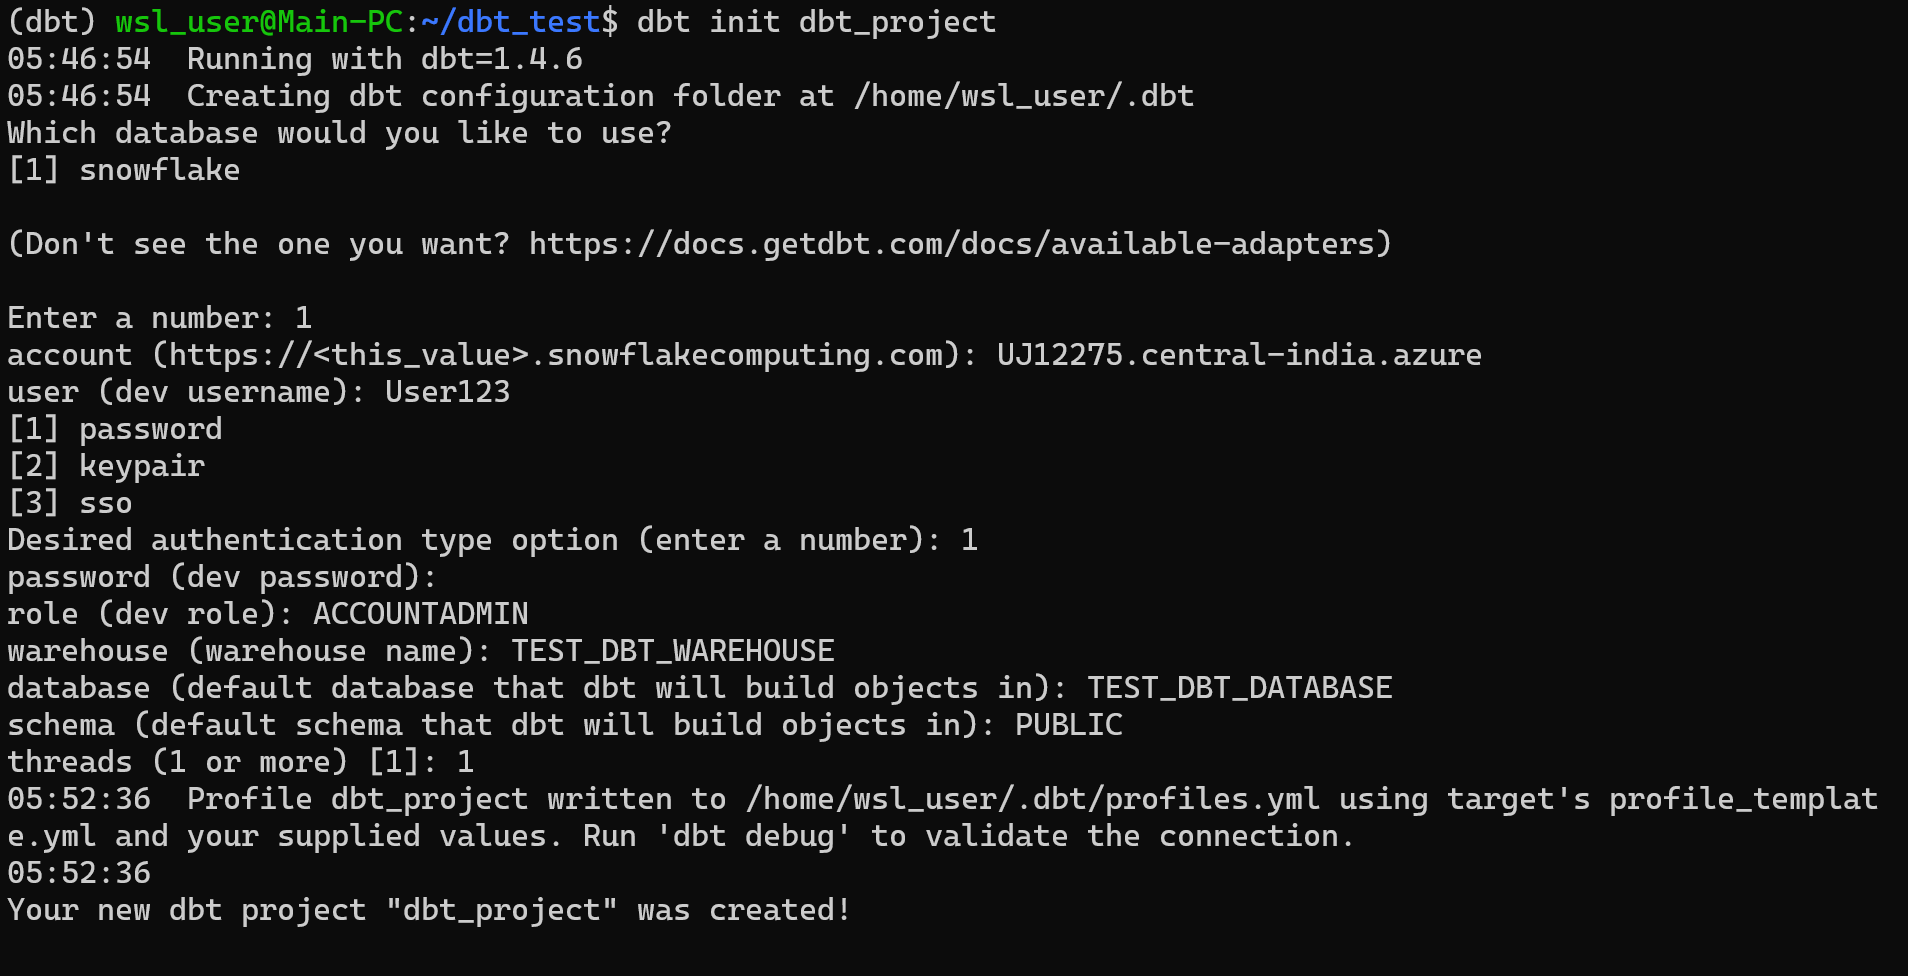
This will create a ‘profiles.yml’ file. This file will be under the different paths on different operating systems.
Linux: <span class="code-exp">~/.dbt/profiles.yml</span>
Windows: <span class="code-exp">c:/users/<your_user>/.dbt/profiles.yml</span>
MacOS: <span class="code-exp">~/.dbt/profiles.yml</span>
If you wish to edit any of your authentication details, you can edit them in this YAML file.
Moreover, instead of using a password, you can also authenticate using a key/pair authentication file and an SSO authenticator configuration file.
Once all the details are in place, you can use the dbt debug command in the terminal to test the connection.
run <span class="code-exp">dbt debug</span>
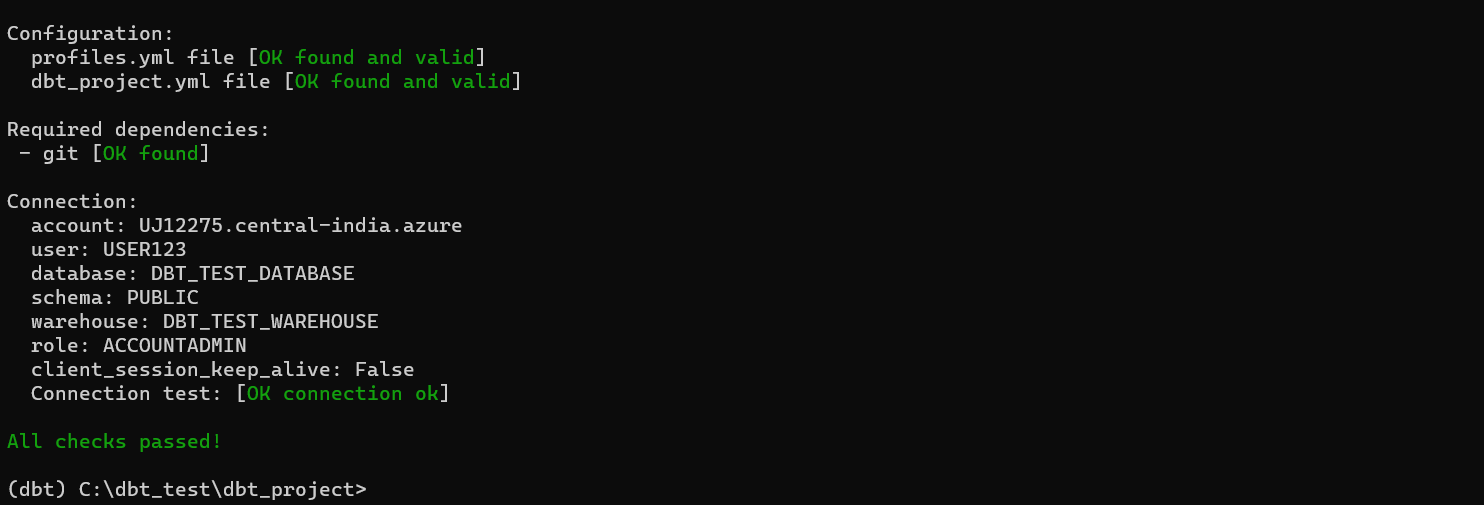
And with that, our connection is established and ready for data modeling.
Troubleshooting
While going through the setup procedure, you may face the following common errors.
‘dbt’ command is not recognized
This error occurs when your operating system can not find the installed dbt package. The easy fix is to create a virtual environment and install all dbt-related packages in the isolated environment.
dbt_project.yml not found
By default, dbt looks for the dbt_project.yml file to load project configurations. If it cannot find the required file, you are likely not inside the project directory. Simply move into the project directory where dbt expects the .yml file, and all will be good.
Username or Password Incorrect
Make sure that the User and Password entered in the profiles.yml file are the ones created for Snowflake, not dbt.
- Review dbt logs for any errors and warnings
Final Thoughts
Connecting dbt and Snowflake is a crucial step in streamlining your data transformation and analytics workflows. By integrating these tools, you can efficiently manage, test, and deploy SQL transformations while leveraging Snowflake's scalable, cloud-based data warehouse. This enables your team to access clean, transformed data for insightful reporting and decision-making.
Further reading
- How to build a Snowflake API
- Introducing the new Metric Report API: Powerful reports for any app with a single GraphQL request
- How to build in-product analytics with Snowflake and GraphQL
If you don’t have a Propel account yet, you can try Propel for free and start building data apps.


